
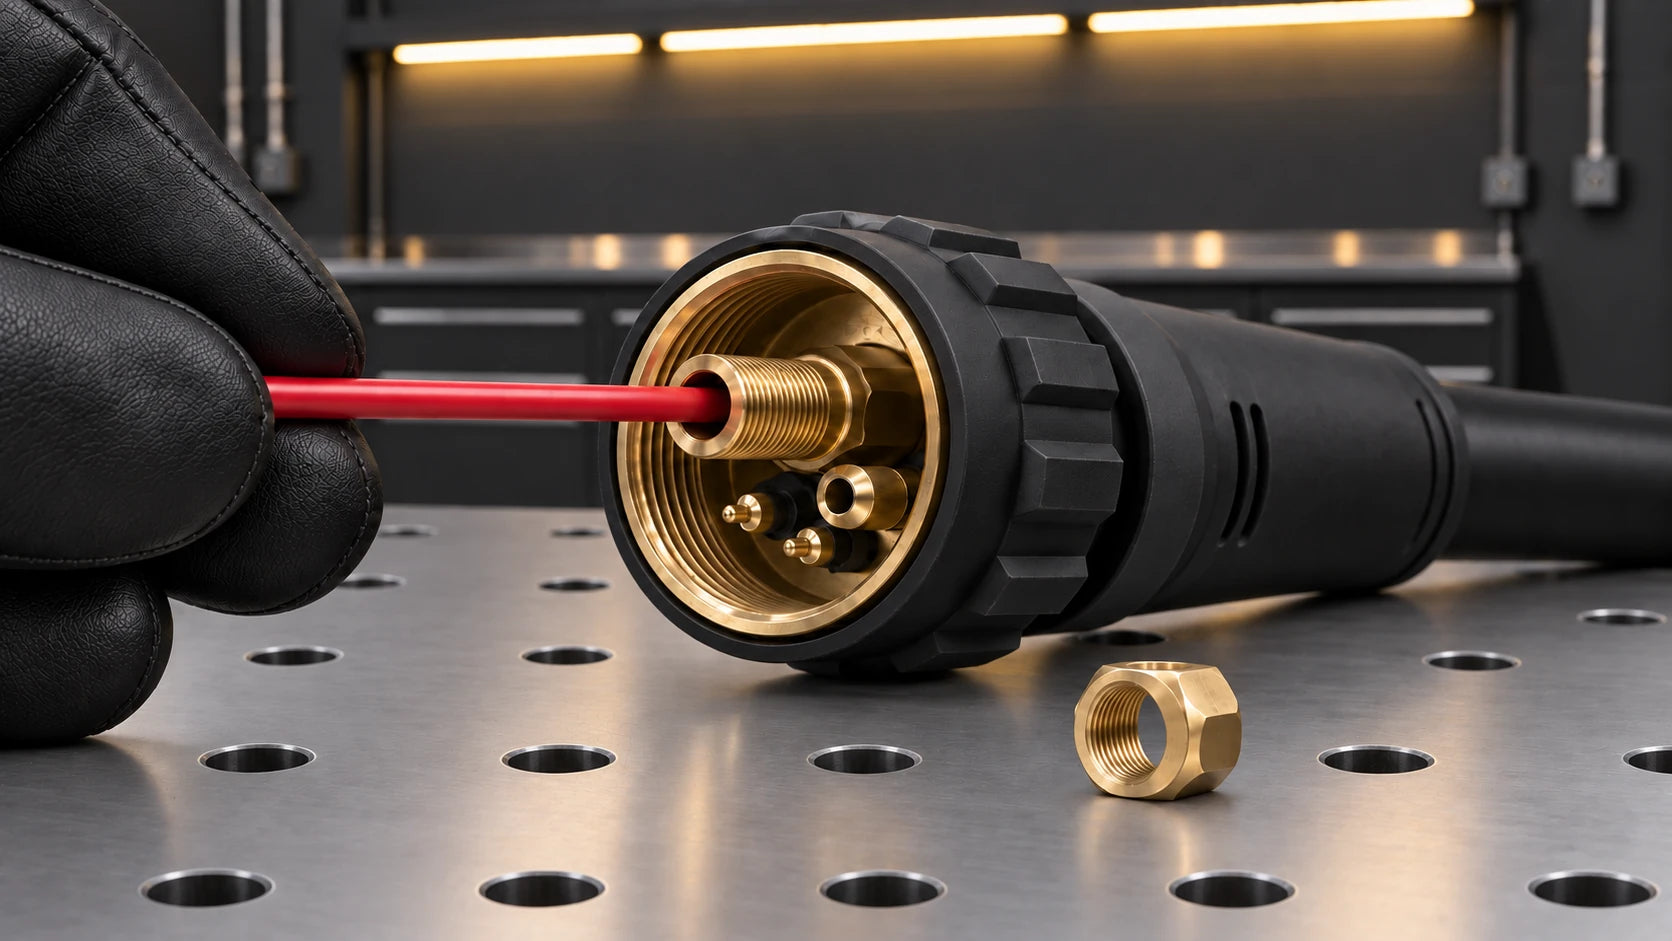
The liner in your MIG torch is just one component that makes up a smooth wire feeding experience. If there are any issues with it, you’re going to have problems when you weld.
That’s why changing your liner as needed is essential. Letting your wire drag because your liner has kinked inside the torch is going to give you an erratic feed, which you don’t want.
Isolate the welder before opening the feeder or dismantling the torch. Follow the torch manual for the liner type, length and fitting sequence.
What is a MIG torch liner?
The liner inside your torch guides the filler wire through your torch lead, and it ensures that the wire makes it out of the torch tip. Like with most things welding, your liner needs to match the type and size of your filler material.
Choose a liner approved for the wire material and diameter. Aluminium commonly uses a suitable polymer liner; stainless wire needs a compatible clean feeding path, not automatically the same liner as mild steel.
Liner colours are manufacturer-specific. Use the part number and supported wire range to identify a replacement.
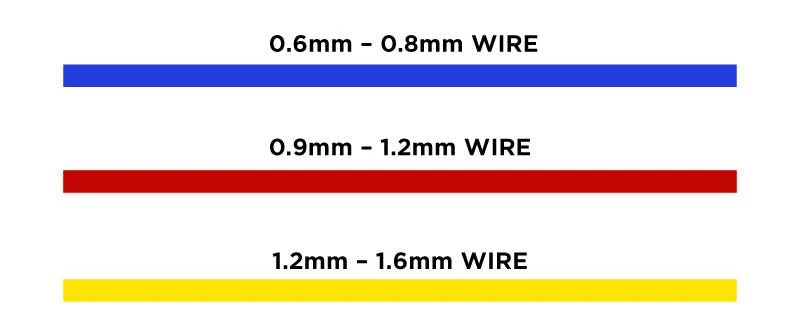
Some designs require a separate neck liner or guide; others do not. Check the torch parts diagram.
You may need to change your liner before you feed your wire through, as they’ll only fit specific sizes. You’ll also need to change your liner if it is clogged, damaged or kinked. Here’s how.
How to change a MIG torch liner
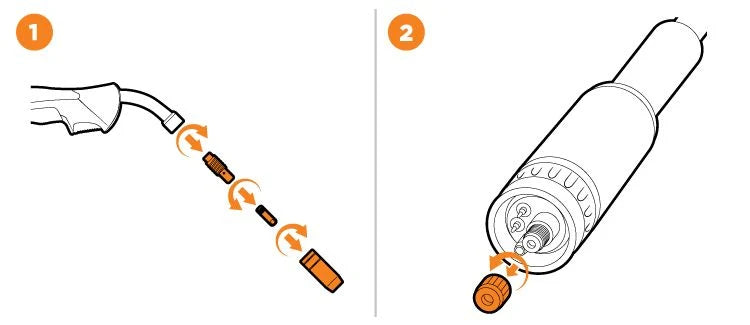
With power isolated and the wire removed as directed, remove the front-end parts required by the torch manual. Keep the cable straight and supported.
Release the liner-retaining parts using the method specified for the torch.
Withdraw the old liner without forcing it past a damaged fitting.
Inspect the cable and guides, then insert the correct replacement liner with the cable laid straight.
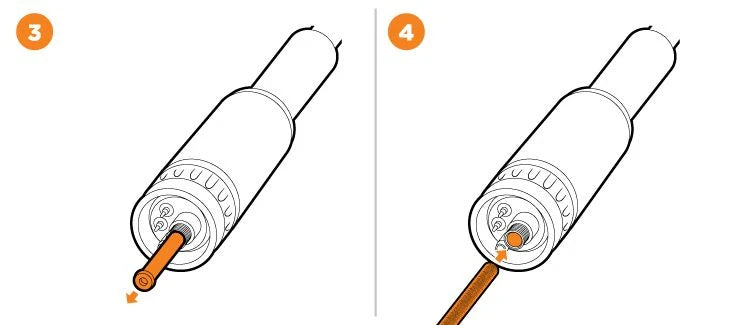
Position the retaining hardware as the manual specifies before setting the final liner length.
Set the liner length using the torch manufacturer's dimension; cutting it flush is not a universal rule.
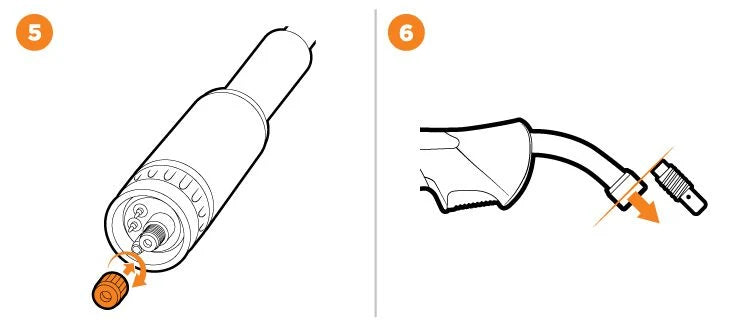
Deburr as specified and refit the compatible front-end parts. Check that the liner is correctly seated without a gap or excessive compression.
Complete the liner retention using the manufacturer's tightening method, then check the finished assembly before restoring power.
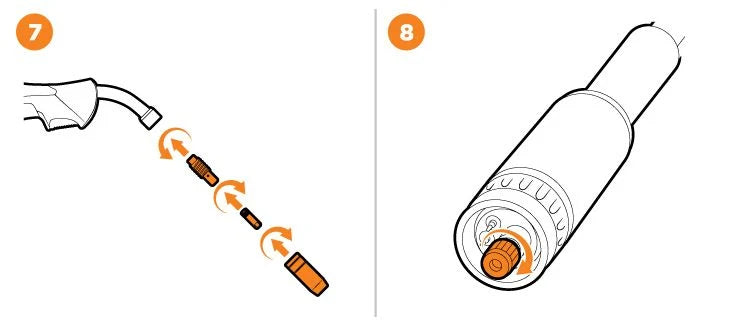
When you’re changing your liner, it’s best to keep the torch entirely straight and go slowly, as you don’t want to kink the liner itself.
Do not copy an old liner's length unless the manufacturer permits that method and the old liner was correctly fitted.
There are separate liners for steel wires and aluminium wires. If you’re going to use a standard MIG torch for an aluminium wire, you’ll need an aluminium specific liner (in the correct size).
How to change a Teflon liner
Replacing a Teflon liner (when working with aluminium) is mostly the same as replacing a steel liner, except there are a few extra steps.
For a polymer liner, use the correct connector, support tube and seals for the torch system.
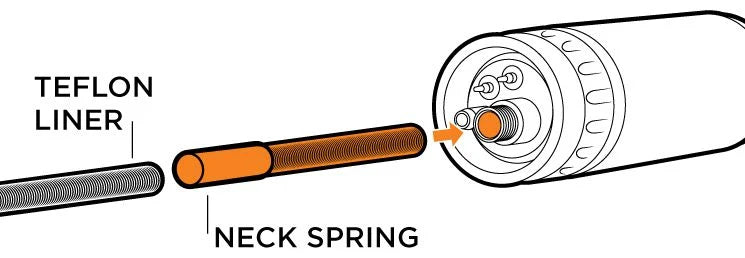
Follow the specified liner insertion and retention sequence.
Fit a neck guide or liner only if that torch design requires one.
Check that the liner and guide leave the prescribed support at the feeder end.
Trim only to the manufacturer's stated dimension, using the specified cutting method.
Refit the tip and nozzle with the correct compatible parts.
Confirm that the liner is seated, supported and not crushed before reconnecting the torch.
Restore power only after assembly is complete, then check feeding with the manufacturer's threading procedure and hands clear of the wire outlet.
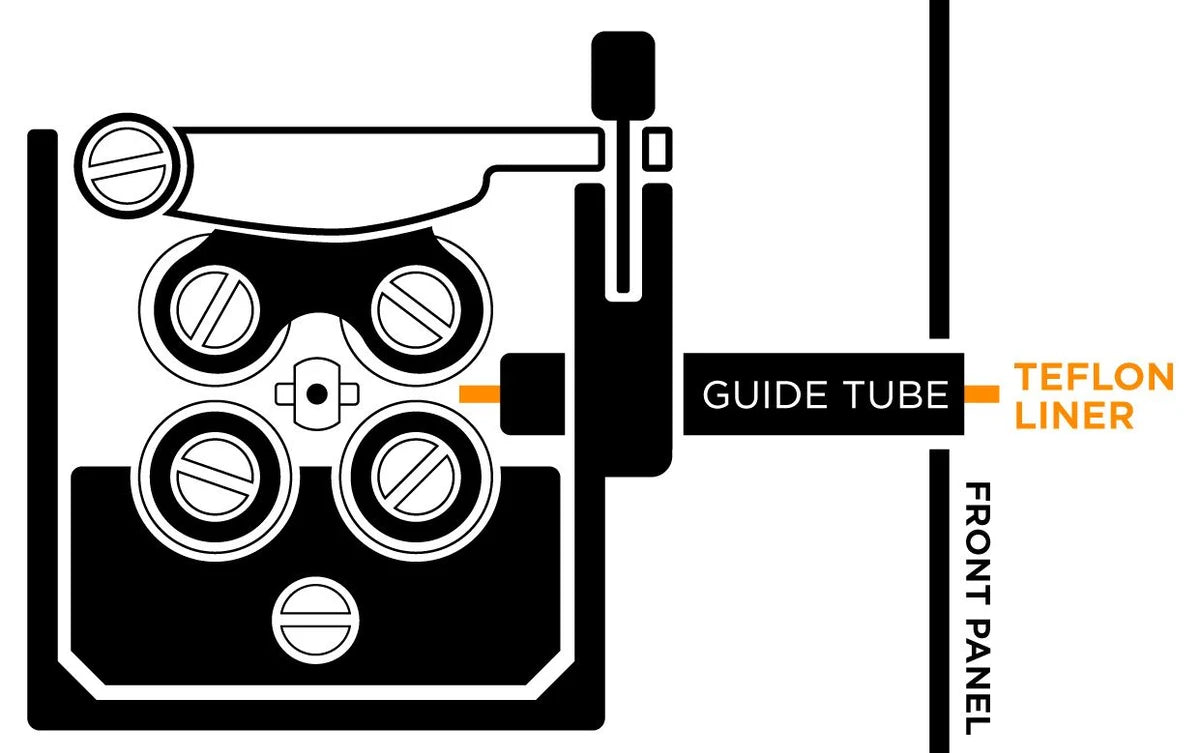
Provide wire support between the drive rolls and liner using the specified guide arrangement. Do not extend parts towards moving rollers without the required clearance.
Check the fully assembled torch and feeder before the final threading test.
Checking your liner each time you change out your wire spool means you’ll be able to catch any problems with it early. A damaged or dirty liner is only going to cause wire feeding issues, so if it needs to be replaced, get a new one.
Reference diagrams: UNIMIG. Original source attribution is retained.
Related guides
TroubleshootingMIG Wire Feeding Problems: A Step-by-Step Troubleshooting Guide Process guideWhat Is MIG Welding? Setup, Wire Feed and Technique Comparison guideSpool Gun vs Push-Pull Gun: Choosing for Aluminium MIGFind the correct replacement liner.
Have the torch model, lead length, wire material and wire diameter ready.
Browse UNIMIG BINZEL MIG torch liners and MIG torch parts. Match the liner to the torch, lead length, wire material and wire diameter.
Ask us about thisTechnical sources and scope
Reviewed 22 September 2026. Manufacturer examples apply to the named equipment; use the current manual for your exact model and the required welding procedure.
- ABICOR BINZEL — PP torch operating and liner-fitting manual
- SafeWork NSW — Welding processes code of practice (2022)
The replacement sequence is an overview. Liner length, guides and retention must match the torch model.


