
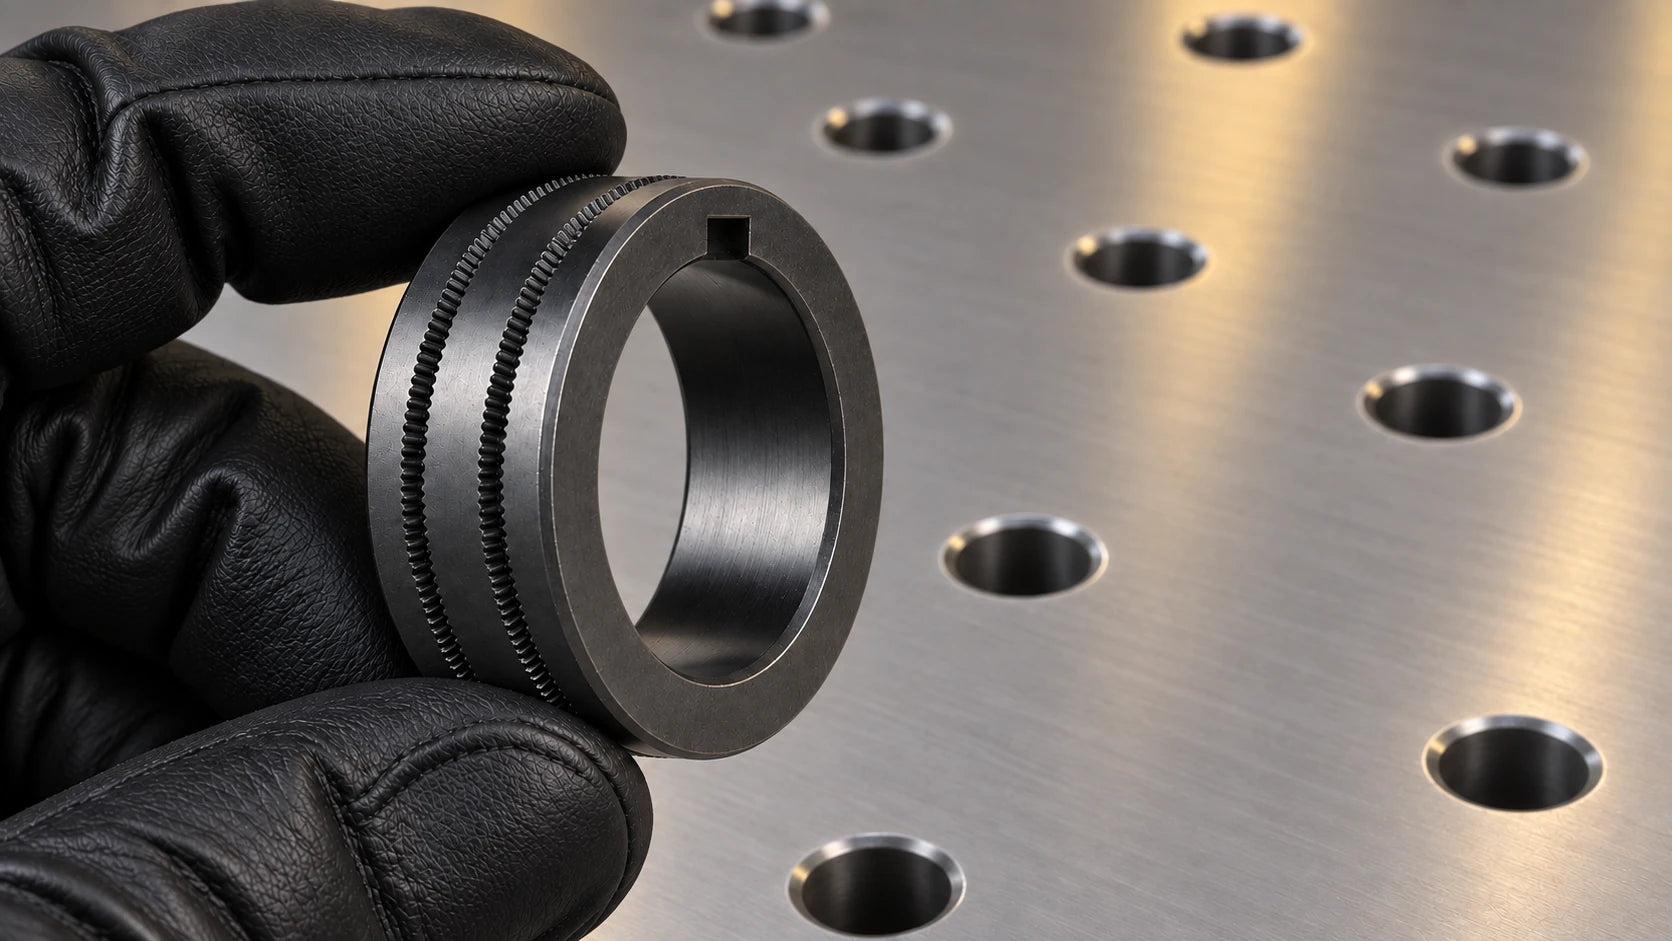
Like with most welding issues, wire feed problems can be caused by a number of things, and you’ll want to check them all to make sure you’ve fixed it permanently.
These checks cover common wire-feed problems. Isolate power before touching the feeder or dismantling the torch; internal electrical faults need a qualified service technician.
Have you got good quality wire?
The first thing that goes into your MIG welder is the spool of wire. The actual quality of the wire can make a difference to how smoothly it feeds. Make sure to get good quality MIG wire that meets the Australian and New Zealand standards at a minimum.
Layer-wound and random-wound spools both exist. Judge the wire by its specification, condition and freedom from tangles, rather than assuming winding appearance alone proves quality.
If your MIG wire spool has been sitting in the garage for a while, you should check that it’s still okay to use. If it wasn’t sealed before it was put away, moisture and prolonged exposure to the air might have caused it to rust.
Running rust through your torch liner will cause even more issues, so it’s best to avoid it entirely. If you do see rust on your spool, there’s a good chance that rust goes all the way through, and you’ll need to get a new one.
Store wire clean and dry in the packaging and conditions specified by its manufacturer. A cloth cover is not a moisture barrier.
Is the spool loaded in properly?
The spool retainer and brake arrangement vary by feeder; they may be separate adjustments.
Secure the spool using the specified retainer so it cannot come loose.
Adjust the brake enough to prevent overrun without causing unnecessary drag.
Fit any locating lug or adaptor correctly and verify that the spool turns as the feeder manual requires.
Check the wire feeding unit itself
If feeding fails after external checks, a motor, control, connection or other internal fault may need diagnosis.
No feed or erratic feed does not by itself identify a failed relay. Have internal electrical checks performed by a qualified technician.
Drive rollers
There are a couple of things that need to be checked when it comes to the rollers.
Use the wire and feeder manufacturer's recommended roller profile. V-groove, U-groove and knurled designs suit different wires, but the exact recommendation takes precedence.
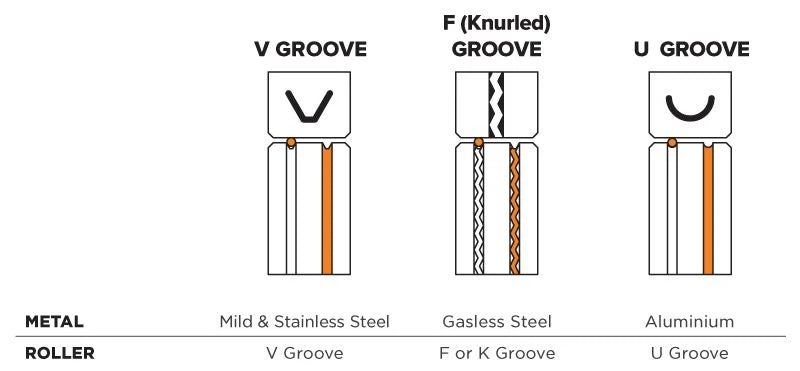
Second, make sure the roller is the right size. Your roller and wire should be the same size so that the roller can properly grip the wire, but it’s not squished in. For example, if you’re welding with 0.9mm wire, your roller should also be labelled 0.9mm.
Match the roller groove to the marked wire size and the feeder's installation instructions; markings are not identical on all designs.
Check the feeder's drive-pressure adjustment. Too little pressure permits slipping; too much can deform wire. The locking and adjustment arrangement varies by design.
Set drive pressure using the manual's method, such as its specified test against wood. Do not hold feeding wire between your fingers or place hands near moving rollers.
Keep in mind that the grooves in driver rollers can wear down over time and lose their shape, so they’ll need to be replaced every now and then.
If the drive still slips, inspect spool drag, guides, liner, tip and cable routing before increasing pressure or assuming the feeder is faulty.
If there’s a failure with your electrical components, you’ll need to take your machine in for a service.
Liner
Like your drive rollers, you’ll need to check that your liner is the right type and size.
Select liner material and diameter range by the torch maker's part number; colours are not universal.
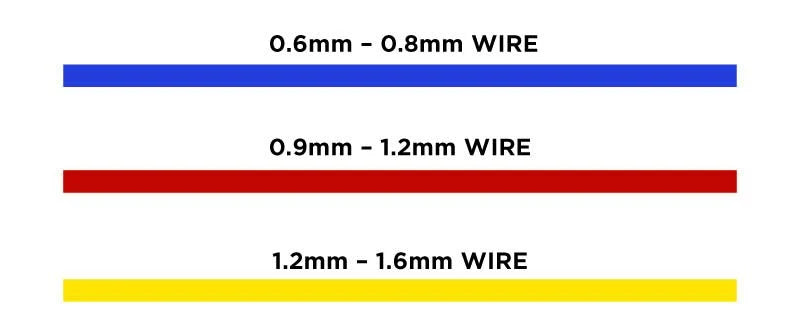
Fit a separate neck liner or guide only where the torch system requires one.
If you’ve got the right liner type and size, the last thing to check is that it’s fitted properly and it’s not blocked.
Clean or replace the liner as the manufacturer permits. Control expelled debris and dust, and do not blow contamination towards people.
Quick tip: swapping your liner to a Teflon one when welding with aluminium means you won’t be feeding your temperamental aluminium wire through steel shavings. (Saving you from dealing with issues caused by contaminated aluminium.)
Verify the liner length and seating against the torch manual. Required projection differs between systems.
Replace a permanently kinked or damaged liner rather than assuming straightening the outside of the torch restores the wire path.
Contact tip
Your contact tips are pretty similar to the torch liners.
There are aluminium specific contact tips available, so make sure you haven’t accidentally left your steel tip on for an aluminium wire (and vice versa).
They’re also sized, so you can match them to your wire size. The contact tip size dictates how wide the borehole is, so a tip that’s too small won’t allow the wire to even feed through.
A worn or incorrectly sized tip can cause poor current transfer, burnback or erratic feeding. An oversized bore does not necessarily stop all electrical contact.
If the manual calls for removing the tip for threading, isolate output before removal and refitting. Keep clear of the exiting wire during the feed test.
Contact tips wear down, and you can’t use the same one your machine came with forever. If your tip is visibly worn or damaged (e.g., from wire burning back), you’ll need to replace it.
They can also become blocked, which you can clear out. If it can’t be cleared, chuck it out and grab a fresh one.
Torch leads & trigger
If inching works but trigger operation does not, inspect the selected mode and approved control connections. This symptom alone does not prove which component has failed.
Have damaged trigger wiring or torch parts assessed for approved repair or replacement; the entire torch does not always need replacing.
Some other things that can cause issues with your wire feeding are the torch length and how straight it is.
The longer your torch is, the harder the driver rollers have to work to feed wire to the end. This is especially true of softer metals like aluminium, which are already difficult.
A shorter compatible lead may reduce feeding resistance, but first diagnose the wire path and use only a supported torch configuration.
It’s also a good idea to try and keep the torch as straight as possible. Putting tight curls or having the torch lead double back on itself might kink your liner (see above), which will cause problems. It doesn’t have to be dead straight, but keep any loops in the torch as loose as possible.
If you’re really struggling, especially with softer wires like aluminium, you should try a push-pull gun. They come with a small motor in the torch itself, so the wire isn’t just being pushed the whole way; it’s being pulled through the torch as well.
Not every machine is compatible with a push-pull gun, as they don’t all have the right connection, but if it does, they’re a great option.
Other things to check
Here are a couple of other things you can check if you’ve tried everything mentioned above and you’re still experiencing issues with your wire feeding.
- A poor work-return connection can destabilise the arc. It is a different check from a mechanical wire-feed obstruction.
- Confirm polarity from the wire data sheet and machine instructions, not simply from the base-metal type.
- For small or soft wire, minimise unnecessary bends and use a compatible lead length; a shorter lead does not itself prevent kinks.
When it comes to wire feeding issues, there are a lot of steps you can take to try and fix the problem and get the machine back to running smoothly. However, if none of the above solutions work, your next step should be taking your machine in to get it serviced.
Reference diagrams: UNIMIG. Original source attribution is retained.
Related guides
Maintenance guideHow to Change a MIG Torch Liner: Steel and Teflon Liners Process guideWhat Is MIG Welding? Setup, Wire Feed and Technique Comparison guideSpool Gun vs Push-Pull Gun: Choosing for Aluminium MIGWire still feeding unevenly?
Tell us the machine, torch, wire and what happens when the feed problem occurs.
Ask us about thisTechnical sources and scope
Reviewed 22 September 2026. Manufacturer examples apply to the named equipment; use the current manual for your exact model and the required welding procedure.
- Miller — feeder operating manual and drive-pressure procedure
- ABICOR BINZEL — PP torch operating and liner-fitting manual
- SafeWork NSW — Welding processes code of practice (2022)
Mechanical checks are separated from electrical diagnosis. Internal fault-finding is not presented as a DIY operation.


