
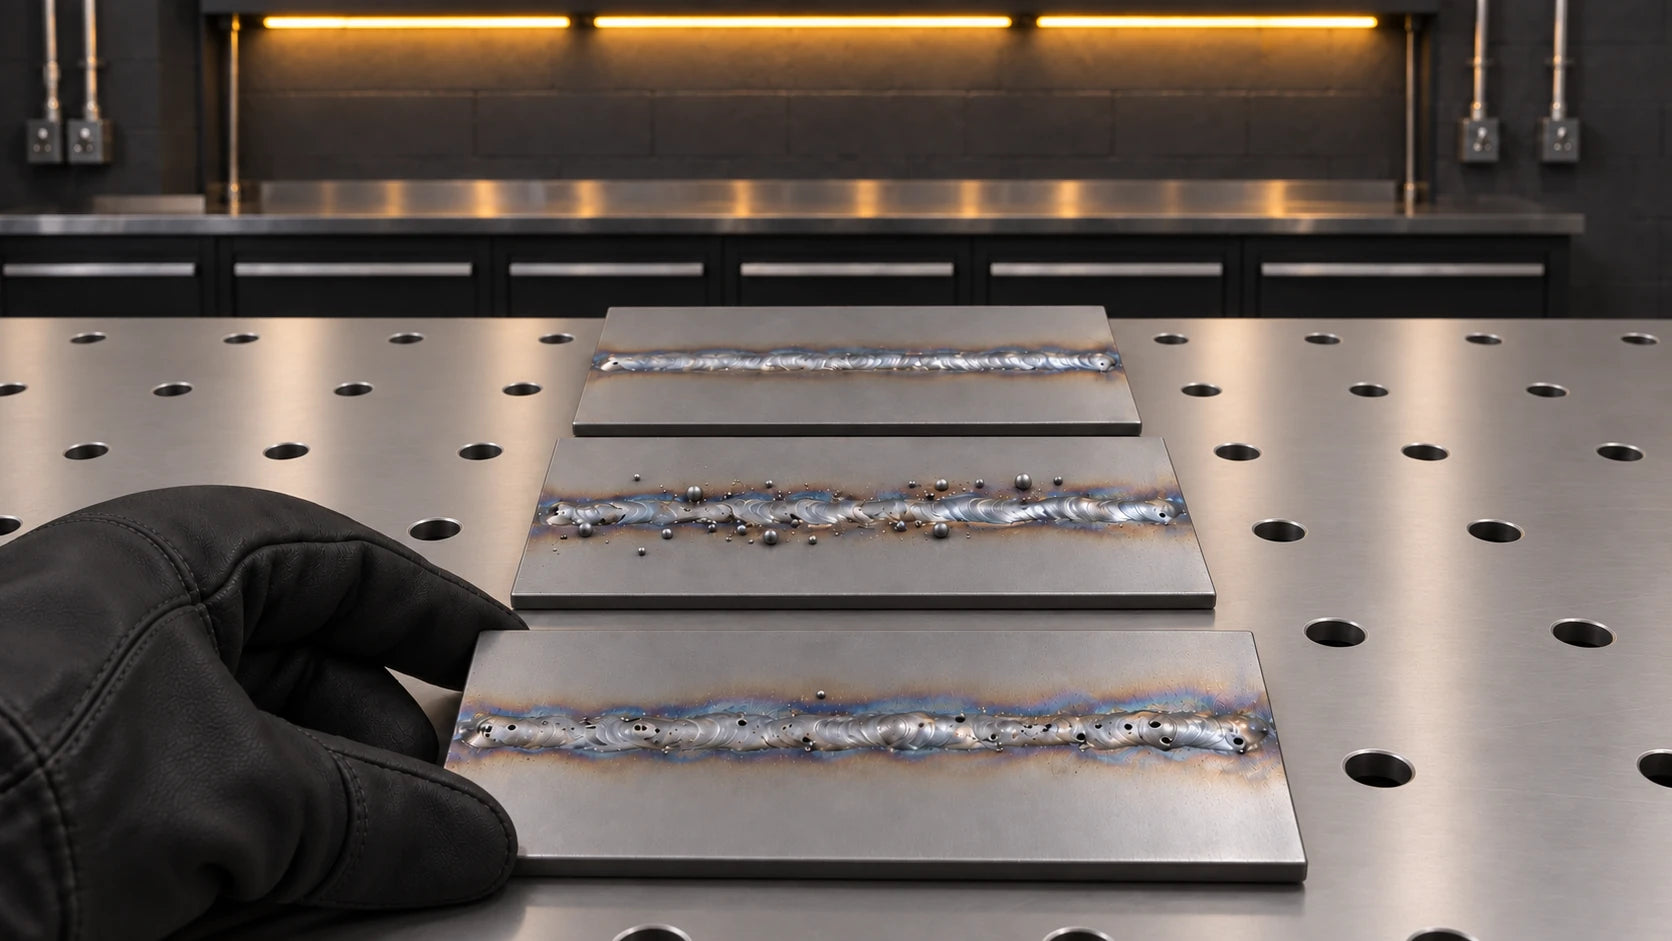
1. Porosity
What is it and what does it look like?
Porosity forms when gas becomes trapped as weld metal solidifies. Sources include inadequate shielding, contamination and moisture; it is not limited to atmospheric gas entering the pool.
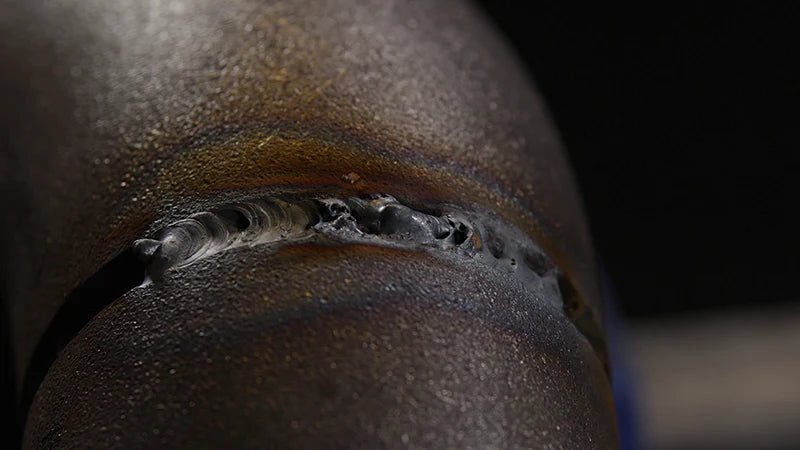
What causes it?
- Dirty parent metal
- Not enough shielding gas
- The wrong type of shielding gas
- Contaminated gas
- Incorrect torch angle or position
How can you prevent or fix it?
- Thoroughly clean your parent metal and give your filler a wipe down
- Clean your consumables and replace any that are worn or damaged
- Make sure all of your equipment is moisture free
- Set gas flow for the process, nozzle and conditions; excess flow can also disturb shielding.
- Choose the shielding gas for the wire, material and transfer mode. Stainless MIG gas is not interchangeable with TIG gas.
- Use the torch angle and arc length or electrode extension specified for the process; one angle and a 3 mm gap cannot cover every weld.
- If there’s a draft or you’re outside, set up some makeshift walls to block any wind
2. Cracks
What is it and what does it look like?
There are 3 types of crack that you can get:
Hot Cracks
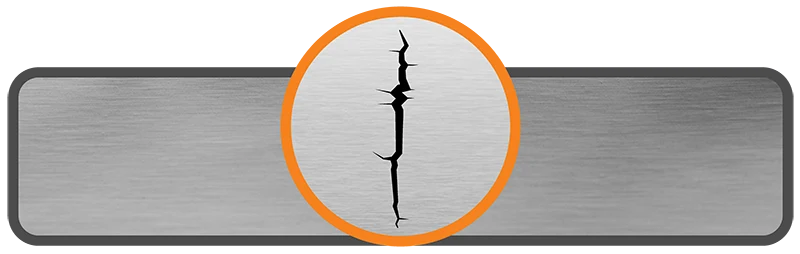
Solidification cracking occurs as weld metal solidifies, when contraction and restraint act on a susceptible weld composition or shape.
Cold Cracks
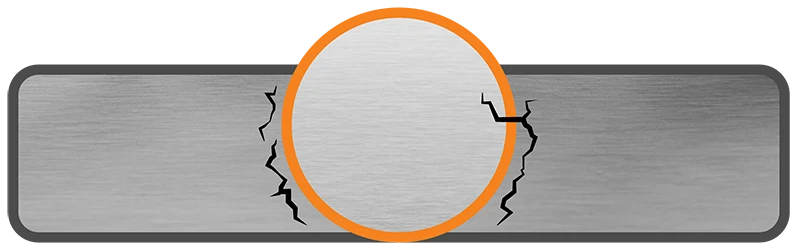
Hydrogen-assisted cold cracking requires a combination of hydrogen, a susceptible microstructure and tensile stress. It can occur in the weld or heat-affected zone.
Crater Crack
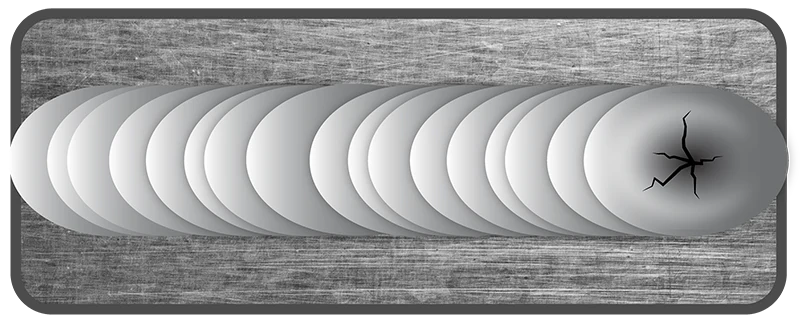
Occurs when the end of a weld isn’t filled properly, a weak point forms and can crack
Hydrogen cracking may appear after the joint has cooled, including after a delay. Fatigue cracking during later service is a different mechanism.
What causes it?
- The wrong type of shielding gas
- Inadequate control of hydrogen, thermal conditions or restraint for a crack-susceptible material
- Using the wrong type of filler metal
- Not filling the joint in properly, especially at the end (this will cause a crater crack)
- Poor joint configuration and preparation
How can you prevent or fix it?
- Use the correct type of gas for your metal type
- Control hydrogen, heat input and joint restraint through the welding procedure.
- Preheat, interpass temperature and any post-weld heat treatment must be selected for the material and procedure, not added as a generic crack remedy.
- Select filler for the material, required properties and procedure. The closest tensile-strength number is not always the correct choice.
- Use a ‘backfill’ method to add extra filler at the end of your weld and let the weld build up slightly to prevent craters
- Prepare the root gap and joint geometry to the drawing or procedure. A zero-gap fit is not correct for every joint.
- Determine the crack's extent and cause before repair. Remove the affected material to an approved repair profile, then reweld and inspect as required.
3. Undercut
What is it and what does it look like?
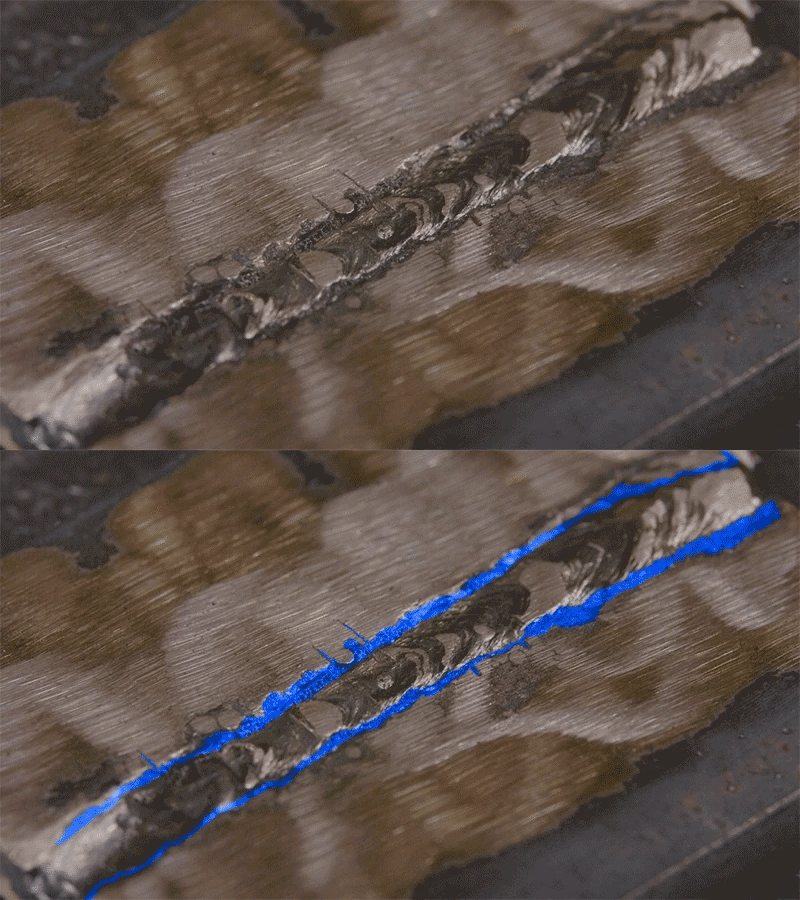
Undercut is an unfilled groove melted into the parent metal at a weld toe or root. It can result from incorrect current, arc placement or travel; it is not defined simply by a wide bead.
What causes it?
- Arc length is too long
- Too many amps or too much heat
- Not adding enough filler
- Too fast a travel speed
- Angling the torch too far in one direction
How can you prevent or fix it?
- Make sure to keep a tight arc
- Lower your amps and heat so that you’re not excessively digging into the joint
- Slow your travel speed, so there is enough time to fill in the joint properly
- Keep your torch tip centred on the middle of the joint or towards the thicker metal
- Assess undercut against the permitted limit. Repair unacceptable grooves using the approved preparation and welding procedure, rather than simply covering them with another pass.
4. Overlap
What is it and what does it look like?
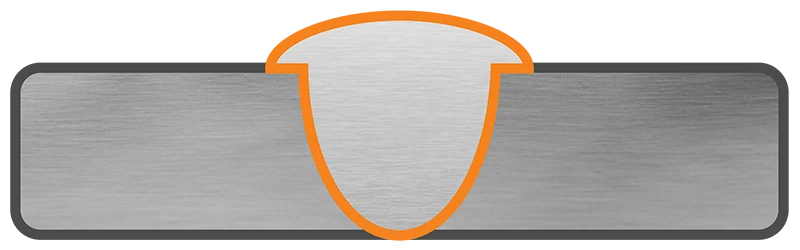
Overlap is weld metal extending beyond the toe or root without fusing to the parent metal. It is different from permitted convexity; a sound fillet weld does not always need a perfectly flat face.
What causes it?
- Too much filler metal
- Incorrect welding technique
- Not enough heat (amps/volts)
How can you prevent or fix it?
- Use less or a smaller filler wire
- Make sure you’re welding at the correct angle with a good arc distance
- Increase your volts (MIG) or your amps (TIG & stick)
5. Distortion
What is it and what does it look like?
Distortion can also be referred to as warping, in which the metal hasn’t been able to cope with the expansion and contraction that comes with heating and cooling. It often looks as though the metal has begun to pull and warp. A lot of the time, it means there’s been too much heat in the plate, not just the joint, which the metal can’t handle.
What causes it?
- Too much heat
- Travelling too slowly
- Not clamping enough
- Not enough tacks
How can you prevent or fix it?
- Where possible, do short welds or stagger your welds to spread the heat
- Balance heat input, weld size and sequencing within the procedure. Increasing current alone is not a universal way to reduce distortion.
- Use a balanced welding sequence where the joint design permits it; do not add an unrequired weld simply to counter distortion.
- Keep interpass temperature within the procedure's limits; some work requires a minimum temperature as well as an upper limit.
- Use suitable restraint and a planned sequence, recognising that excessive restraint can increase cracking stress.
- Use the specified tack size and spacing to maintain fit-up.
- Metal is always going to warp, even if it’s just slightly, once there’s heat in it; the important thing is to minimise the amount of distortion, especially on critical welds
- Straightening or heat correction requires an appropriate procedure, especially on structural, heat-treated or safety-critical parts.
6. Burn Through
What is it and what does it look like?
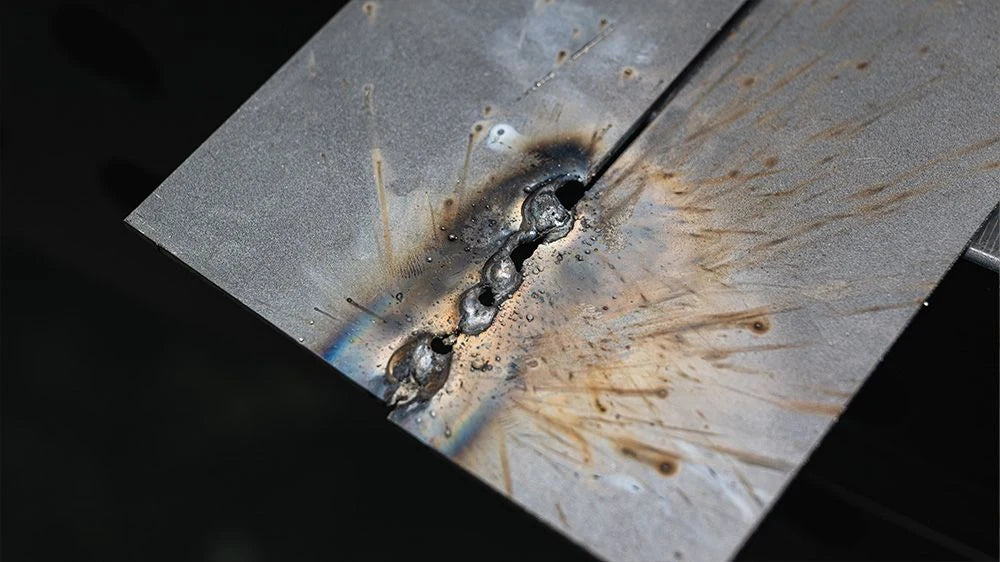
Burn through is, literally, burning through your metal so that filler protrudes out the other side, or in more extreme cases, where you’re left with a hole.
What causes it?
- Too much heat in one concentrated area
- Too high an amperage
- Too slow a travel speed
How can you prevent or fix it?
- Turn your amps down
- Increase your travel speed
- If you’ve put a hole in your metal, there are two things you can do
- A burn-through repair must restore the specified joint geometry and weld quality, not merely hide the opening.
- Assess remaining material and access before selecting a repair method; inspect the repaired area to the job requirements.
7. Lack of Fusion
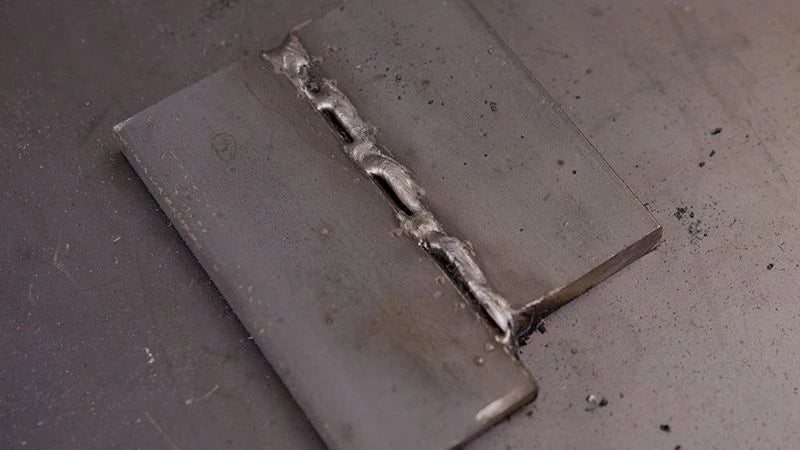
What is it and what does it look like?
Appearance cannot prove internal fusion. Use the inspection or test method required by the specification; an improvised break test is not an acceptance test, and each NDT method has limitations.
What causes it?
- Too fast a travel speed
- Not enough heat
- The torch angle is incorrect
- The filler metal or electrode size is not big enough
- Incorrect joint design or fit-up
How can you prevent or fix it?
- Increase your amps and slow your travel speed
- Wait until a wet pool has formed on the metal before moving and focusing on pushing or pulling it along; you want to be in control of it
- Make sure that your joint is lined up properly, with the correct sized gap
8. Lack of Penetration
What is it and what does it look like?
Incomplete penetration is a defect when the joint requires penetration that has not been achieved. A deliberately designed partial-penetration joint is different.

What causes it?
- Too small a root gap or a misaligned/improper joint fit-up
- Not enough heat
- Too fast a travel speed
- Using an electrode that is too large with amps to match (TIG)
- Poor welding technique
How can you prevent or fix it?
- Check that you’re using appropriate amps/volts/wire speed and travelling at a speed to match
- Make sure that you’re holding your torch at an appropriate angle with a tight arc
- Prep your root gap so that it is not too narrow you can’t get into it, but not so wide you can’t fill it and that everything is lined up
9. Slag Inclusions
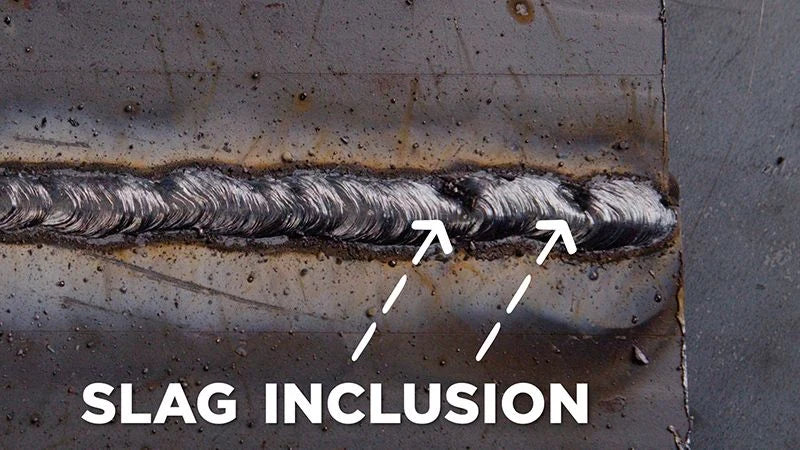
What is it and what does it look like?
Slag inclusions can occur in flux-using processes, including stick, self-shielded or gas-shielded flux-cored welding and submerged arc welding.
What causes it?
- Slag wasn’t removed prior to the next pass (on multi-pass welds)
- Poor quality or poorly stored electrodes
- Using the wrong welding technique (pushing instead of pulling)
How can you prevent or fix it?
- Store your filler metals in a cool, dry space, preferably sealed in a container
- Follow the electrode manufacturer’s storage and re-drying instructions. Do not re-bake every damp electrode: requirements vary by coating and classification.
- Use the proper welding technique: pull (drag) the filler
- Maintain a good arc length
- Clean slag off properly between welds
10. Spatter
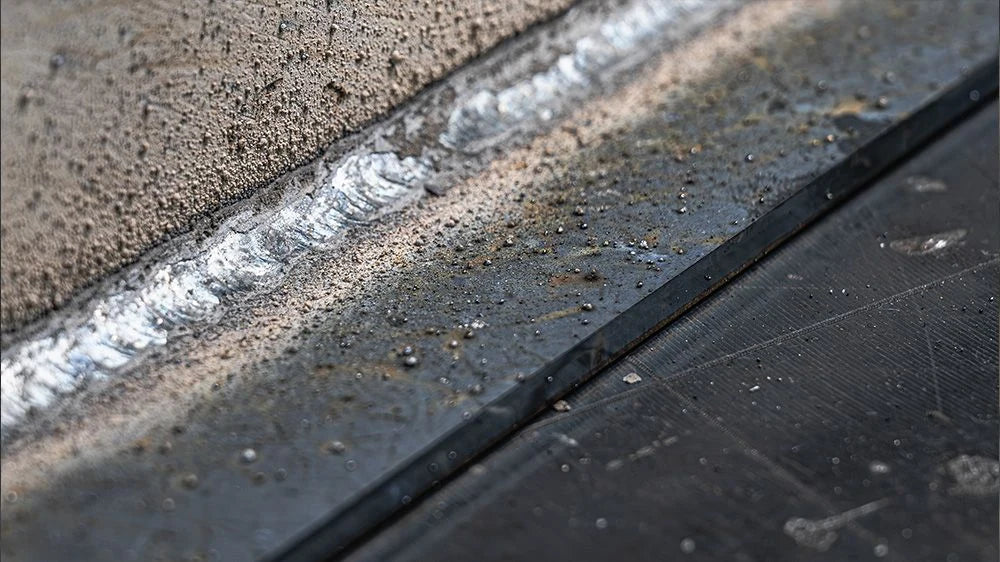
What is it and what does it look like?
Spatter can damage surfaces, interfere with fit or coatings and create a burn hazard. Its significance depends on the application.
What causes it?
- The amps are too high
- The volts are too low, or the wire speed is too high (MIG)
- The arc length is too long
- Your work angle (torch position in relation to joint) is too steep
How can you prevent or fix it?
- Control arc length or electrode extension for the selected process, rather than applying a universal 3 mm rule.
- Readjust your amps/volts
- Prep your metal and clean any dirt, paint, or otherwise from the surface
- Use an anti-spatter spray so you can just chip it off once you’re done, rather than coming back with a grinder
11. Craters
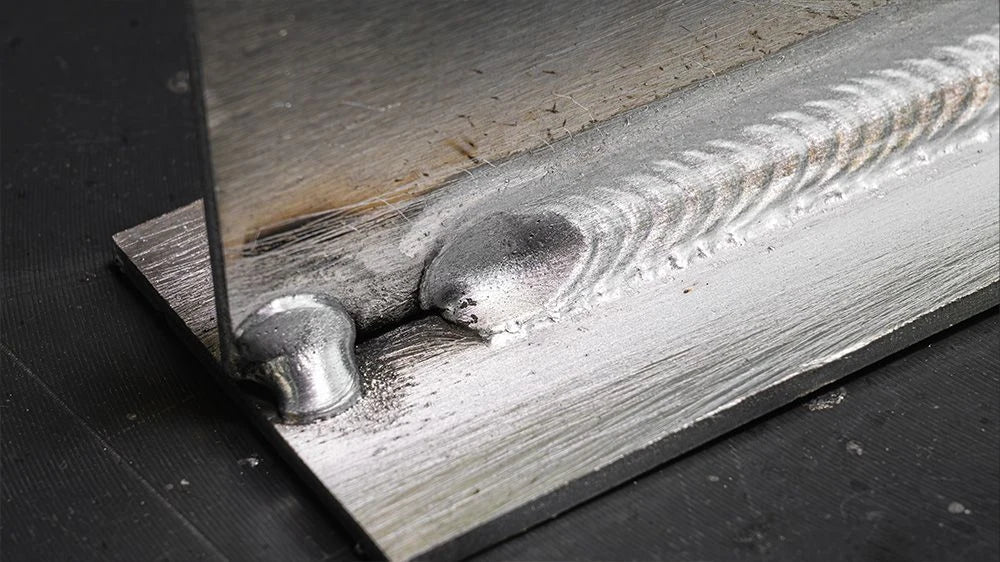
What is it and what does it look like?
A weld crater is a dip or hole at the end of a weld that hasn’t been fully filled. Weld craters can happen on any kind of weld. They can often lead to cracking, so filling the end of your welds is important.
What causes it?
- Not enough filler metal deposited at the end of the weld
How can you prevent or fix it?
- Pause for a few extra moments (or dab extra filler for TIG), and let the weld bead build up slightly
- Ease off the amps slowly to narrow the weld pool as you come out of the weld
- Once you reach the end of the weld, ‘back step’ to fill in the end
12. Convex and Concave Weld Beads
What is it and what does it look like?
Check fillet leg size, effective throat and permitted profile against the drawing or code; appearance alone is not acceptance.

What causes it?
- A convex (or ropey) bead is caused by
- Not having enough heat to properly flatten the weld at the same time as,
- Travelling too fast
- A concave bead is caused by
- Too much heat
- Travelling too slow
How can you prevent or fix it?
- Use settings from the exact wire, machine and procedure as a starting point, then verify them on a representative joint.
- Use the travel direction and angle suited to the process and wire; shielding gas does not by itself determine push or drag technique.
Almost every issue you encounter when welding can be prevented with proper preparation. It can seem like a lot of work and hassle, but doing it in the first place will be a lot faster than having to remove a dodgy weld and start again (and then still need to be prepped!).
If you start with dirty metal and a poorly calibrated machine, you’re not going to get the greatest weld. Be patient, and if something goes wrong, we can help identify and solve the problem so you can be back up and running in no time.
Article written by UNIMIG Australia - published March 2, 2021 titled "Troubleshooting Your Weld"
Sources for revised guidance
Reference diagrams: UNIMIG. Original source attribution is retained.
Related guides
TroubleshootingWeld Porosity: Causes, Prevention and Troubleshooting TroubleshootingMIG Wire Feeding Problems: A Step-by-Step Troubleshooting Guide Process guideHow to Weld Aluminium: MIG, TIG and TroubleshootingGet help with a recurring weld problem.
Include the material, process, joint, settings and photographs when asking for advice.
Ask us about thisTechnical sources and scope
Reviewed 22 September 2026. Manufacturer examples apply to the named equipment; use the current manual for your exact model and the required welding procedure.
- TWI — weld porosity
- TWI — hydrogen cracking mechanisms
- TWI — solidification cracking
- TWI — incomplete root fusion and penetration
- TWI — slag inclusions and weld profile
- SafeWork NSW — Welding processes code of practice (2022)
Mechanisms and troubleshooting were corrected. Actual repair procedures, NDT and structural acceptance require the job specification and competent assessment.


